Your body continues to go on experiencing changes as you grow older, every passing day. Once you conceive your body undergoes numerous hormonal changes, that are pretty normal and you need not worry at all. Your body goes on to prepare for the fetus in order to grow and then allow it to develop into a healthy baby. Nevertheless, there are numerous conditions that may lead you to a miscarriage or an abortion. Abortion is a process of stopping down the pregnancy simply by removing that fetus or an embryo (that is to grow and develop in order to make a healthy baby) before it goes on to survive properly. It is better when done at the very initial stage of one’s pregnancy.
As your body prepares for the thorough development of the fetus, it began storing foods and the fats that allow you to grow round and plump. There is a higher probability for the one, who is pregnant to gain weight post an abortion. That is when the weight loss becomes a major important factor in order to get yourself back in shape. For the same here are a few of the tips regarding the weight lose after abortion that would help anyone who has gone through this phase in life.
Ensure Proper Intake Of Nutrition
One requires adopting a balanced diet that offers you everything i.e., required and is necessary for your health. Just focus on consuming a diet that is rich in proteins, iron, vitamins, and carbohydrates alongside healthy fats. Women tend to put on weight right after abortion in order to tackle this, the lady takes to the crash dieting that is a big no-no simply because the malnutrition hampers the routine and usual functions of your digestive and the metabolic systems which will pave way for the amassing of the stubborn fats which become pretty impossible to eliminate later on.
Intake Of Water In Adequate Amounts
Dehydration can hamper the overall functioning of one’s liver, stomach, and other various body parts which also enhances the other existing toxins in your body speeding up the fat accumulation. Drinking enough amount of water helps to keep your body hydrated and supply that necessary nutrient to your body.
Avoid Strain, Stress, And Depression
All these can hamper any normal body functions leading to mood swings and mental stress. These may lead to an accumulated deposition of fat that is pretty difficult to get rid of.
Adopt Healthy Eating Habits And Lifestyle
Avoid consuming junk food which is rich in unhealthy carbs and fats. Avoid emotional eating and binge eating as it eventually leads to weight gain. Rather, concentrate on eating healthy, add tonnes of fruits and the green vegetables to your diet pattern. Also, you can add some basic forms of physical exercise in order to help you lose that weight after an abortion.
Include Physical Exercise
You need to lead an active lifestyle, go for jogging, or a running, walk, you can join a health club with a motive of burning excess calories in a healthy manner.
Opt For A Low Carbohydrate Diet
Carbohydrates are the bodybuilding foods and when you continue to consume a high carb diet then, you will only increase your fats. Look out for fibrous food such as fruits, vegetables, whole grains, lean meats, to your diet.
Hopefully, these tips will help you get back on track and will surely help you in weight lose after abortion in a healthy and best manner.
A woman has a wave nature: the functioning of her body and emotional state are subject to constant changes. Today you are cheerful and full of energy, and tomorrow ─ in decline and do not want anything, is it familiar? This is absolutely normal for a woman. The main goal that I pursue in my classes ─ to harmoniously distribute energy through special exercises, taking into account the peculiarities of the female body and psychology.
Below is a small complex of female yoga, which has a positive effect on the functioning of the reproductive system and the entire female body.
Sitting on a rug with a flat back, cross your legs (if your knees are high, put a folded rug under your buttocks). Begin to make circular micro movements of the pelvis clockwise. Nothing, if at first, your movements will be inaccurate and slow, continue to “draw” circles with your tailbone and observe the sensations. After circular motions, move the tailbone forward and backward.
When performing this exercise, the sensations are barely noticeable, and it may seem that nothing is happening. But over time, you will feel that this exercise works wonders: the spine falls into place, the lower back will feel better, decrease, and eventually the pain will completely disappear, and also the muscles of the pelvic floor will strengthen.
Get on all fours. Wrists under the shoulders, knees under the hip joints. As you exhale, begin to slowly round the back from the tailbone to the crown of the head, the chin reaching for the collarbone. Stay in this position for several breathing cycles and return to the starting position. Then, as you inhale, begin to bend your back in the opposite direction – the tailbone looks up, the chest is open and stretches down, the head is up, the look is straight. Hands are always perpendicular to the floor. Repeat several times.
This exercise will make your spine mobile, relax the tense muscles of the neck and shoulders. It stimulates and massages the muscles of the abdomen and internal organs, improves the functioning of the central nervous system.
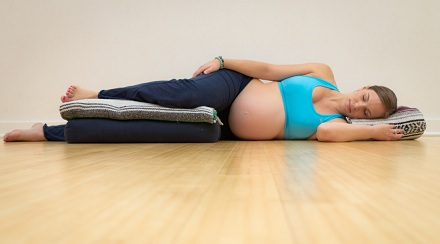
From the previous position we transfer the pelvis to the heels and with an inhalation we begin to lower the stomach to the hips, then the chest and head. Calmly “spread” along the body, shoulders and neck are absolutely relaxed. Eyes closed, breathing free and deep. If your forehead does not touch the floor, place your hands, support block, or plaid under it.
From the previous position we transfer the pelvis to the heels and with an inhalation we begin to lower the stomach to the hips, then the chest and head. Calmly “spread” along the body, shoulders and neck are absolutely relaxed. Eyes closed, breathing free and deep. If your forehead does not touch the floor, place your hands, support block, or plaid under it.
Asana eliminates the stiffness of the knees and ankles, relaxes the shoulder girdle. Fat deposits on the stomach are reduced, perfectly relieves fatigue, physical and psycho-emotional stress and irritability.
Sit with a flat back, connect the feet in front of you. With an exhale, try to lower your knees to the floor as much as possible, stretching the inner surface of the hips, keeping the back straight. On inhale, lift them up, on exhale, down again. The movements are dynamic, like flapping the wings of a butterfly, but not sharp.
This exercise helps to open the pelvis and relax, which in turn helps to reduce stress and relieve the discomfort associated with menstrual pain. In addition, this pose is very useful for people with back problems.
Sit with a straight back, spread your legs as wide as possible, avoiding rounding of the back. Legs are active, pull the socks towards you. While inhaling, raise your hands up through the sides, and while exhaling, going down, spread them apart. Imagine that you are smoothing the skirt in front of you with two hands on the floor. Do not try to go down in case of rounding of the back, keep it as straight as possible. Repeat 8-10 times.
Asana enhances sexuality, liberates, relieves “tightness” in the groin, soothes the brain, strengthens the spine and stimulates the work of internal organs. It is very useful for women – it stimulates blood circulation in the pelvic area and ovarian activity, regulates the menstrual cycle.
Lie on your back with outstretched legs, arms along the body with palms to the floor. Bend your knees, place your feet as close to the pelvis as possible, with your palms on the floor, raise the pelvis up. Bend your elbows and rest your palms on your lower back with your fingers outward. Distribute weight and find a comfortable position. Gently start lifting both legs up. Stay in this position for several breathing cycles.
Asana helps to eliminate toxins from the body, relieves edema, increases vein tone, reduces the load on the heart muscle, and has a rejuvenating effect.
Remaining in a supine position, bend your knees. Spread your arms apart, pressing them to the floor. Cross your legs with your hips crossed (right leg on top). With an exhale, without tearing off your shoulders and shoulder blades, gently lower your legs to the right as low as possible to the floor, and turn your head to the left. Hold in this position for 2-3 cycles of breathing and repeat in the opposite direction, changing the cross of the legs.
This exercise has a good therapeutic effect for the spine, relieves tension from the lower back, improves blood circulation of internal organs.
Stay on your back and bend your knees. Arms extended along the body. Lift the pelvis slightly, gather your palms in the castle and place it under the sacrum. Release the pelvis from the hands and conveniently distribute the weight – if you want to achieve a greater effect, then try to straighten your knees and hold the resulting pose for 6-8 breathing cycles. This exercise perfectly relieves fatigue and swelling of the legs.
Spread the feet wider on one line, socks looking to the sides. Stretch your arms up or fold them in front of the chest in Namaste. As you exhale, sit down, spreading your hips and knees wide apart and maximally pulling the pelvis and tailbone forward and down. The housing must at the same time maintain a vertical position. Take a breath and raise your hands above your head, straightening your knees, as you exhale, again lower yourself into the pose of the stupa.
Such squats perfectly train the pelvic floor, which is especially important for women, strengthen the inner thighs and create a beautiful line of legs.
When we see an obese person, we suggest him to try the gyms and some weight loss diets so that they can shed those extra kilos easily. However, have you even thought that there can be some other reason behind this fact that people are gaining too much weight? You just give your suggestions because you just want to do your part but if you really care about a person who is obese, you need to find them the best solution that can help them get rid of these extra calories. You have to check with them about why they fail in working on diet charts or why they cannot go to gyms or can’t reduce even when they are regular at exercises. You have to be a buddy in their journey of weight loss. Well, you can take the help from this article about how you can get the idea of helping such people and suggesting them the best techniques for this.
There is a latest technique that has gained a lot of fame these days and it is considered as the best and easiest way of making your body lose the extra weight. This process does not include any painful surgeries or crash diets that make you hate everything. You will be more than happy by choosing this technique especially when you don’t need any surgery.
This technique is called the Non –Surgical Liposuction. It is completely non surgical, painless and highly safe for the obese people. You don’t have to fear any scars or stitches or any cuts because this does not involve the usage of blades or scissors. This process starts with a direct pressure on the fat cells of your body making them melt and reduce the size. If you think that you need time to get this process done and are planning to take off for weeks from your work, then you are absolutely mistaken. You don’t have to wait for long or get admitted to the hospital for this process. There are so many good weight loss centers across the country where you can take the appointment and let them know about your wish to lose weight. They will give you the best consultation on this topic and help you at each step.
You can connect with then on call or can personally visit them to know about such procedures or other processes that may help you achieve your goal. Now talking about this process, you have to spare your days time for this and they will do the rest for you. You don’t have to take special holidays for this treatment plan.
This process is done with the help of laser technique or ultrasound radiations that are strong enough to melt the fat cells of your body. As soon as the process is started the cells start breaking down by the pressure that is created with the laser beams. The cells that bun once do not grow again so you don’t have to worry about gaining all the same weight after a week or a month. You can call this Non Surgical Weight Loss Los Angeles services as the best option to shed those extra calories without worrying about gaining them again.
However, you have to avoid heavy diets, high fat foods and aerated drinks to maintain the shape and figure that you gain after this process. You cannot expect any technique to work for long as by side you start taking heavy meals and extra fatty foods that make you gain the calories again. Eat fresh food, fresh fruits, vegetables and healthy drinks.
A healthy meal is all you need after you go for this weight loss process. You can enjoy being a curvy figure with a smart shape for as long as you wish. It’s all in your hands and the control on your mouth.
Every aspect of the human body requires an equal amount of care. A slight deficiency can lead to a big injury, causing undue stress as well as pain. One of the most sensitive areas that humans tend to ignore is back. Especially the lower back area is subjected to extreme pressure, due to the continuation of heavy work, sitting postures or just a fragile core. There are so many significant aspects that can typically contribute to a discomforting situation, where your back pain tends to aggravate day by day. Hence, it is imperative to find the actual reason behind the cause of your back pain.
Indications of back pain in the human body:
Often stress, as well as a poor lifestyle also contributes to lots of back issues. The pain might be gentle in the beginning, but it starts to spread and attack other organs and muscles of your body. Just when you are feeling the symptoms, proper preventive measures need to be undertaken. However, some of the indications that the person is suffering from back pain, are as follows:
The person is no longer able to stand properly.
Even normal duties seem to be problematic.
Participation in daily chores is not possible.
Imbalances in the body.
Wrong posture
The person starts to have side effects like muscle pain, nausea, headache, etc.
Individuals seem to get disconnected from the world.
Therefore, once these symptoms start to arise, it is careful to note that the back pain is only at its first stage. Taking precautions here will help to reduce the signs in the human body. But what is the right method to prevent back pain? Today’s doctors recommend an age-old practice that is trusted worldwide and that is yoga. This ancient practice is known for its magical healing postures and nothing can beat the comfort level you receive after doing yoga.
The Importance of Yoga:
Careful studies at the professional Physical Therapy Institute at Sicklerville states that ‘’yoga stresses on three key elements in the human body- flexibility, ensuring the stability of the core, and finally correcting the posture. Yoga is also of the opinion that nothing is possible, until and unless the individual is aware of the proper steps to breathing. The coordination of all these important elements will showcase the results in the human body. In fact, when you are practicing yoga, the body goes through a stage of healing. As the individual breathes in and breathes out during the exercises, positive signals are sent to the brain, which starts internal cleansing and healing of all sorts of pain.
Therefore, if your back pain is providing you extreme discomfort, then yoga is the best solution to curb down the pain before it starts to spread to the whole body. However, yoga experts often lay the importance of practicing the right pose. In fact, any wrong posture can worsen the pain, leaving you with no other solution, other than opting for surgery. Therefore, try to do some simple stretching in the beginning, so that the body starts to get flexible. Accordingly, take up some light postures and practice them slowly!
Some precautions to be taken before you opt for yoga!
Adapting to some of the best Yoga postures in order to cure back pain is an easy solution. However, if you have a prolonged history of any sort of bodily injury, then seeking medications from your doctor is a wise step. Before you start with yoga, you need to ascertain that there are no side-effects involved. Yoga practitioners are of their opinion that it is good to consult physical therapists, so that they can guide you thoroughly, with your troubles.
Also, if your back pain is the cause of headache, an aching body, and excessive discomfort, then the yoga postures should be mild. Try not to stress too much, or else, the pain might slightly increase. Just so to avoid any kind of alignment problems, talk to your physical therapist or an expert yoga enthusiast about the poses that you should adopt today. This will provide long-term results, and the benefits will indicate a better mind and a healthy body!
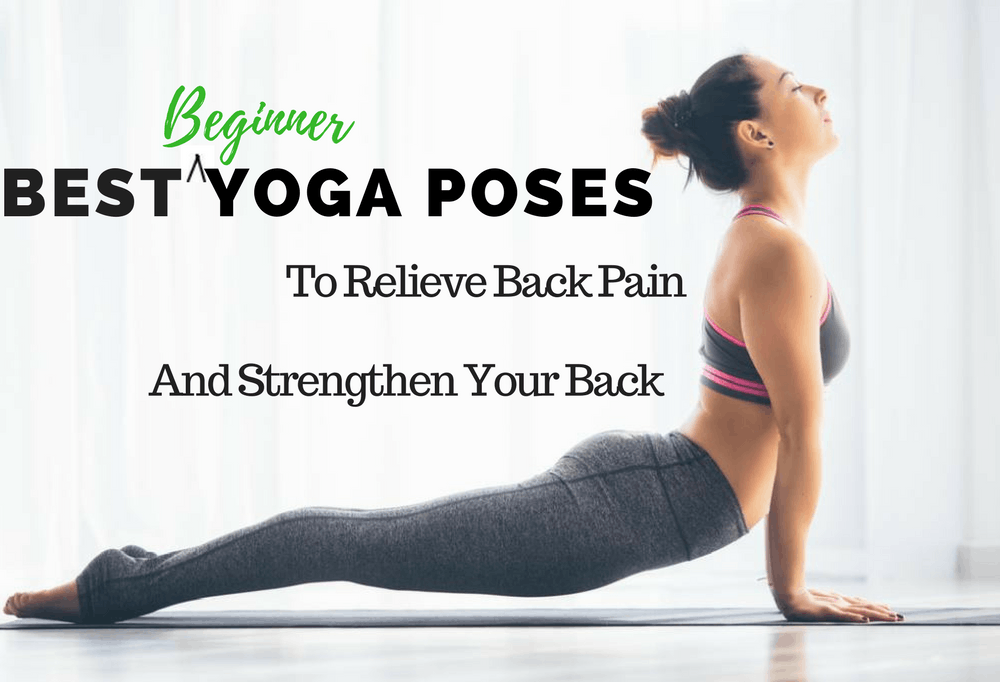
Some stretches and yoga postures that are perfect for alleviating back pain!
To improve your back-pain issues, some of the yoga postures recommended by experts, are listed below:
The child’s pose
Cat or cow posture
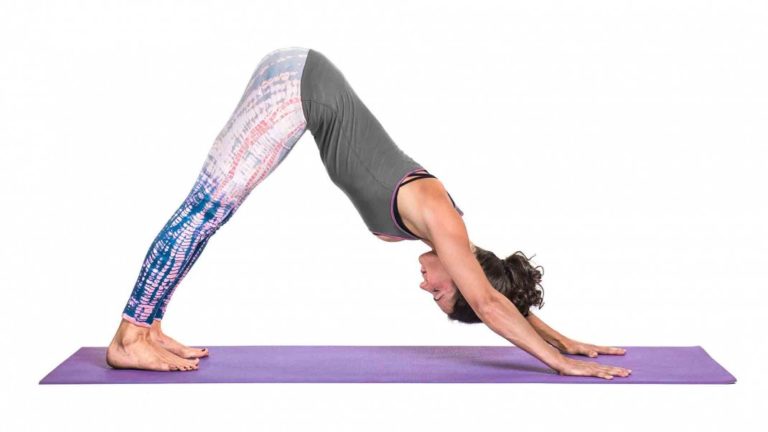
Dog facing pose
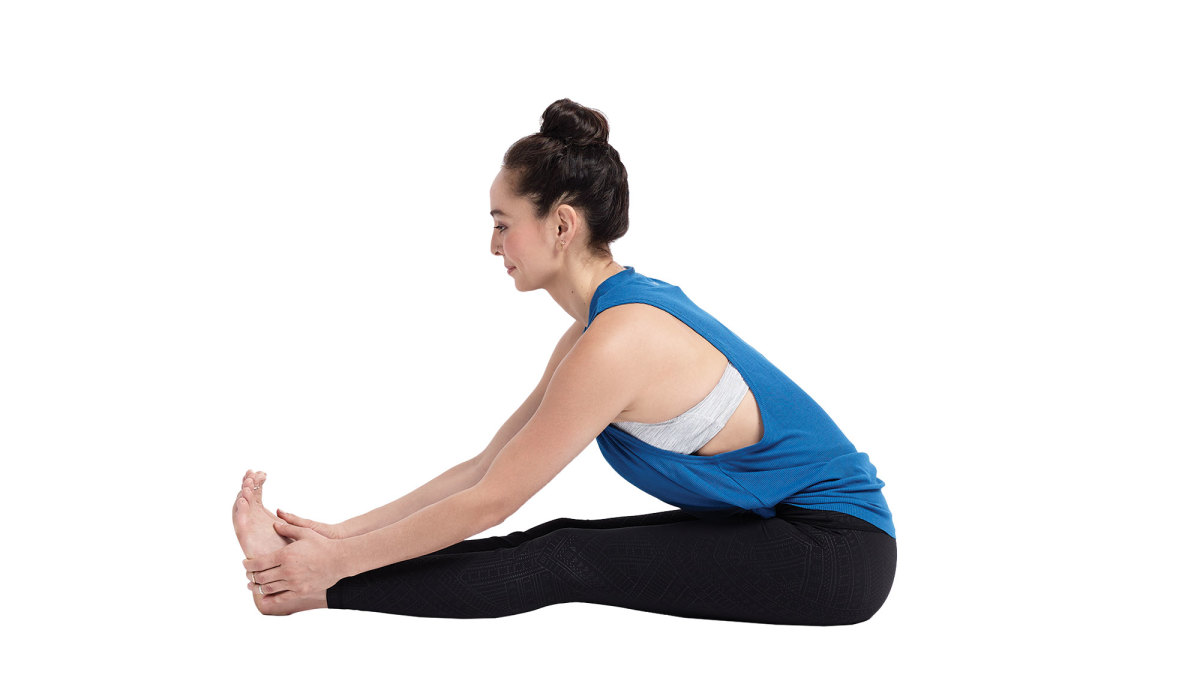
Foot bend
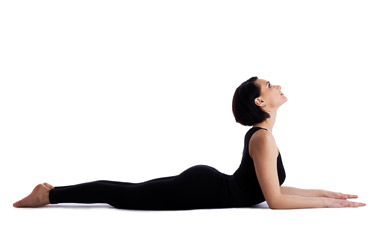
Sphinx posture
Reclining pigeon pose
Supine twist posture
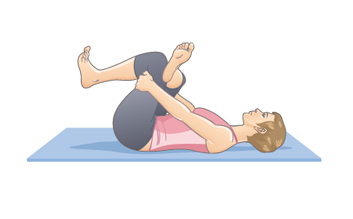
Stretching from knee to chest
A detailed guide on how to practice each one of the above-listed postures are dictated below:
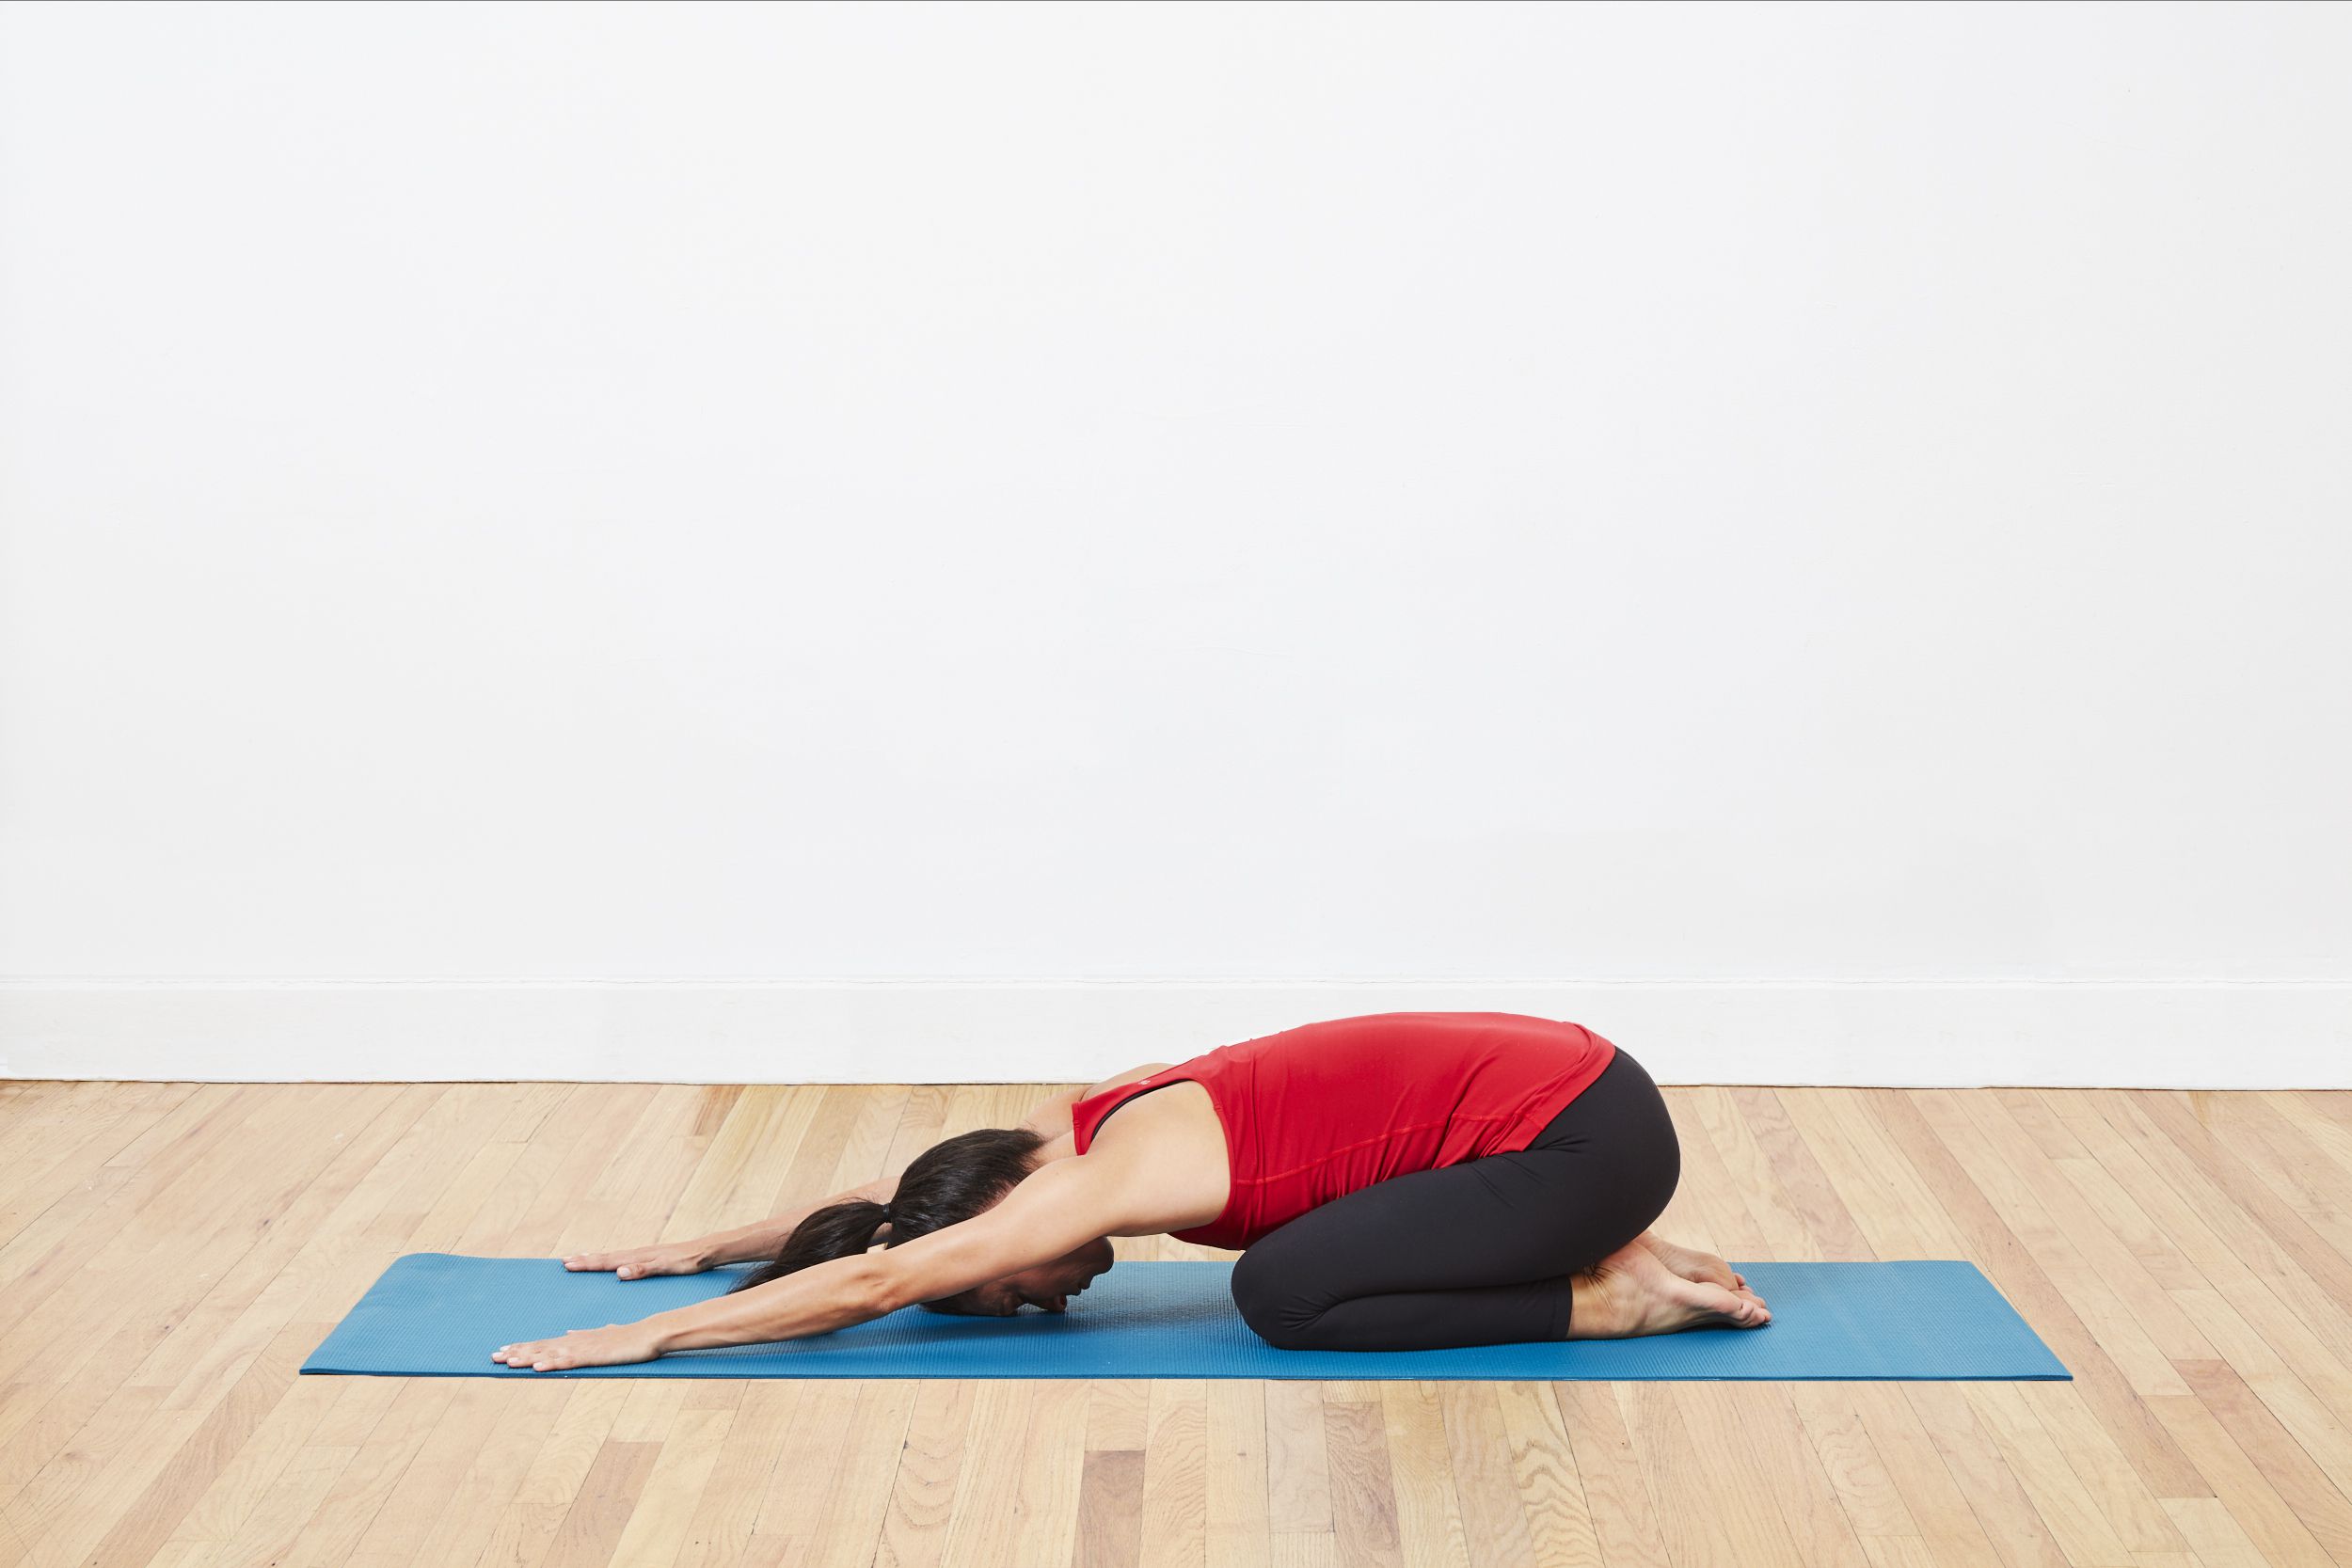
The child’s Pose: The child’s pose is one of the basic exercises that will elongate the lower back, and help in the expansion of your back muscles. Plus, it will make your spine flexible, whereby, you will find less difficulty to stretch. This pose decompresses stiffness in your body and provides instant relief.
Take a mat and then kneel on it by folding both your legs. Make sure that your legs are straight here.
Now, extend your arms and fall in towards your stomach. Transfer the weight to your stomach area now.
Keep on breathing and avoid getting stiff near your torso and thigh area.
Rest your hand and your forehead on the ground. Try to extend your arms as far as possible.
Breathe in and breathe out normally and hold onto this posture for at least 3 minutes!
Cat or cow posture: The cat or cow posture is said to provide extra extension facility, helping to strengthen your core and releasing stress from your body. This posture can promote better spine health, can reduce thighs and belly fat, and even release tension from your lower back area. However, individuals carrying out this posture need to check their balance and avoid bending as well as arching too much at one point in time.
Fold your legs and your hands and adopt the cat or cow posture. Rest your hands naturally, without exerting too much pressure.
Now try to inhale and exhale slowly.
While inhaling, try to lift your head up, and while exhaling try to keep your head low.
You will instantly feel comfortable near your hips and back area.
Try to hold onto this posture for at least 3minutes. Increase it once you master it!
Dog Facing Pose: This posture is carried out in a downward position. Have you ever seen a dog stretching? Well, the pose is quite similar, except that you are going to do it in the opposite manner. The dog facing pose is able to provide relief to your hands, chest, and back. The calves will release all pressure, making you comfortable and flexible.
In order to start off with this posture, try to bend your legs and hands first.
Once they are firm, lift your bottom or your butt, and balance your lower part of the body.
Slowly, extend your hands, by spreading your fingers. Straighten your legs as far as possible.
Now, do not rest your leg directly on the ground, but tilt it towards the ground. Raise your hips and balance your body.
Try to stay in the posture for at least 3 minutes!
Foot bend: This is also one of the easiest back pain exercises that you can try today. The ‘’foot bend’’ posture helps in stretching your leg, hips and keeps your back in proper shape. Since the pressure is directed towards your lower back area, you will notice a vast difference in the back pain. If this position hurts in the beginning, avoid holding it for too long.
First, adopt the half-fold leg position and stretch your hands.
Straighten your hands downwards, and try to touch the ground.
Release your butt backward, and tuck in your tummy.
Keep your chin tight and allow your spine to straighten itself and do away with excess pressure.
Now breathe in and breathe out.
You should hold onto this pose for a minimum of 2 minutes, and maximum for 4 minutes!
Sphinx Posture: The sphinx posture allows the human body to completely relax. Here, the mind and body stand in perfect alignment, with the lower back in the complete rest position. There is no stressing out, and the body also releases extra pressure.
First, you must try to flatten your leg and the lay down by your belly. Keep your body alignment straight here, so that you can receive maximum benefits of this yoga.
Now, fold in your hand, keeping them near to your chest. Folding should be done from your elbows. Avoid stretching the leg too far away.
Now, keep your head straight and breathe in and breathe out.
Also, try to calm down your body from the poses you just did earlier, and also relax your shoulder muscles.
Finally, carry on this sphinx posture for at least 3 minutes or more!
Reclining Pigeon Pose: The pigeon posture is also termed as the ‘’figure four position’’. The entire yoga resembles the number 4, which is carried out with your leg. This pose releases the pain from your body and provides strength to your lower half. The legs also strengthen with time, by practicing this yoga.
To carry out the pigeon pose perfectly, lie down with your back towards the ground, in the normal sleeping position. Adjust the body alignment.
Next, take your left foot and cross it over the right foot.
The right foot should be half-folded here.
Stretch your hands at the back, which enables you to distribute the pressure to your back area.
Carry on with this posture for three minutes.
Now, switch the leg sides and repeat the same, for another 2 minutes!
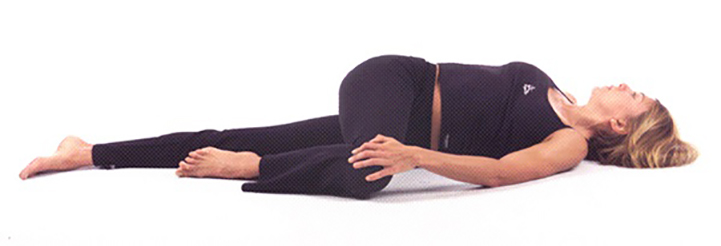
Supine Twist Posture: If you are looking for adequate relaxation by means of yoga postures, then you got to try the supine twist posture for your back pain. Having tons of benefits, this yoga is used to keep your muscles healthy, along with providing relief for your back pain. Sometimes, it is difficult for individuals to carry out this posture, only because there is twisting of the stomach muscles involved. Only if you are suffering from mild back pain, you can carry on with this yoga. However, it is advised to support your back, by placing some soft towel underneath. This will remove any kind of extra stress or pressure.
Now, lie down in the sleeping position and bend your legs half.
Instead of keeping them straight this time, bend them together sideways.
Keep your hands on top of the leg, with the support of your elbows.
Align your head in the direction opposite to the direction of the legs and hands.
Your face should be in the upward direction, and the chest should be perfectly faced towards the ceiling.
Hold this position for at least 3 minutes and change the sides of your leg. Accordingly, change the head position as well.
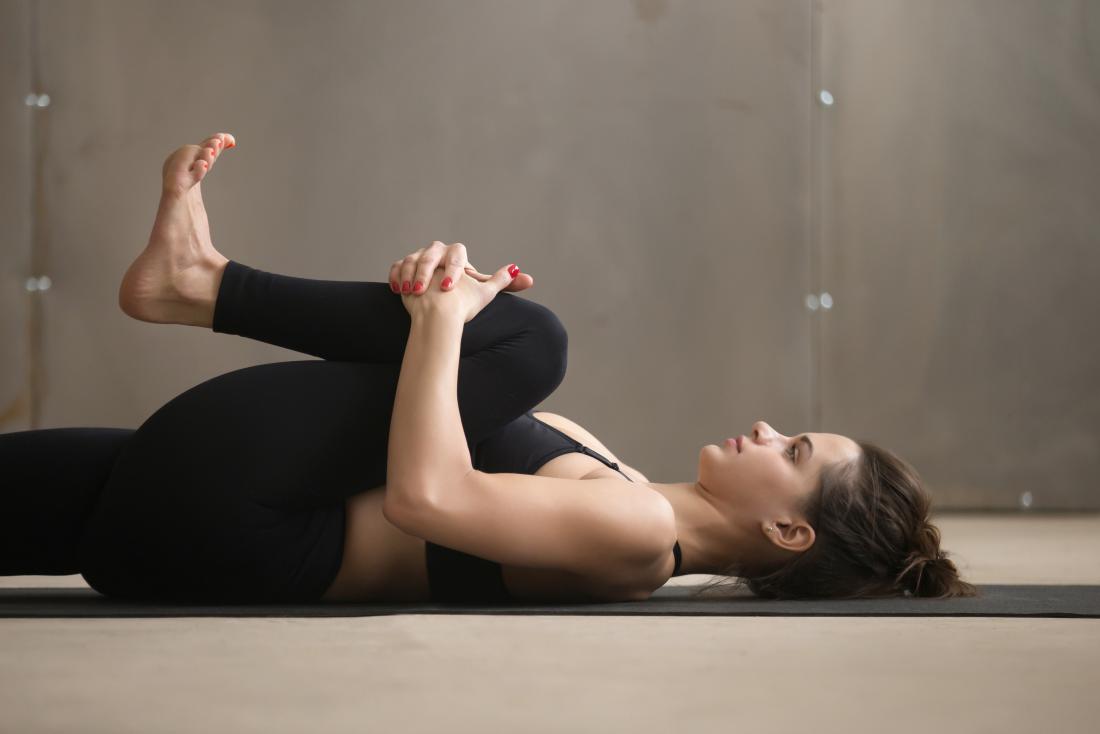
Stretching from knee to Chest: A simple exercise that can work wonders is the knee to chest pose. Your back, along with your stomach muscles, will receive relief from all kinds of pain.
Lie down on the ground in the sleeping position. Rest your arms first.
Slowly, fold your legs and lift them up. Bring them up in the folded position towards your chest.
Keep your chest straight and keep your face straight towards the ceiling.
Hold your legs tight with the help of both your hands.
Now, slowly move your body from one side to another.
Stay in this posture for at least 3 minutes!
The Final Thought: One of the conditions of getting in touch with yoga to get relief from back pain is dedication. Yoga is by far, the only ancient practice that promises to purify the body and soul. Hence, utmost dedication to each posture is mandatory. Also, confidence while doing your poses brings better results. That is why start slow and slowly increase your time for the postures. With time, you will notice a major difference with your back pain!
Yoga Asanas or workouts are approaches of relocating or keeping the body in distinct positions.
Yoga has a few workout routines or postures that work wonders on a woman’s well-being and in being pregnant stipulations. Various generally in software and kind, these workout routines (postures) gently stretch and discover all materials of your body. Throughout being pregnant, yoga Asanas are a tender method to maintain active and supple. The high-quality effects of those postures in pregnancy exhibit the energy of yoga for guaranteeing a delicate pregnancy, average childbirth, and restoration of body shape after childbirth.
Listed here are the fine poses for pregnant women:
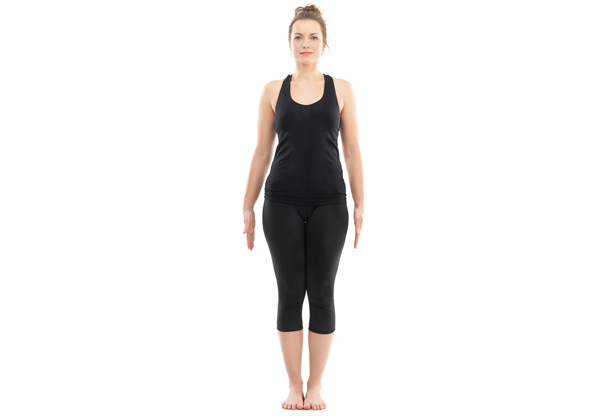
Tadasana – Mountain Pose:
Tadasana is a satisfactory yoga pose for pregnant females. It helps to reinforce your spine and eases your back soreness too.
tadasana
The way to Do:
Stand with feet unfold out at hips width.
Maintain your backbone erect, with palms resting on both side of the physique and arms dealing with the thighs.
Stretch your hands and become a member of the fingers in Namaskar Mudra.
Elongate your spine at the same time inhaling deeply. Lift your palms above your head while.
Stretch your spine as much as possible. But don’t forget to put pressure to your again.
Now, tilt your head backward and hold your eyes on the fingertips.
Preserve the pose for a slow rely on 10. Don’t omit to deeply breathe inside and out.
With a deep exhalation, relax your physique and convey your toes again to the ground.
Relaxation your hands with hands on the thighs.
This completes one repetition. Do 5 such repetitions.
Virabhadrasana – Warrior Pose:
Virabhadrasana is excellent for your whole body. It really works your back, chest, and hip muscle groups. It’s a first-rate pose for strengthening your diminish physique too.
How to Do:
Stand erect along with your toes together.
Maintain your hands on either facet with arms facing your physique.
Now, unfold your ft hip width aside.
Position your left foot firmly on the ground and switch your body entirely to the right.
Bend your proper knee.
Take a sluggish, deep inhalation and slowly lift your palms above your head, arms joined together in Namaskar mudra.
Stretch backward, without exerting your back. Fix your gaze on the fingers.
Maintain the pose for 10 to 15 while respiratory quite often.
Now breathe out slowly at the same time bringing your fingers down.
Straighten your knee.
Slowly deliver your ft back collectively.
Repeat the equal steps on the other side.
This makes one repetition. Do 5 such repetitions.
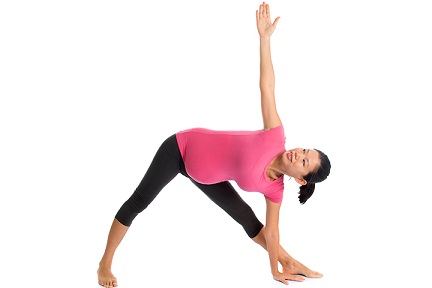
Trikonasana – Triangle Pose:
Pregnancy can take a toll in your digestive approach. In keeping with being pregnant, yoga the Triangle Pose is a pleasant strategy to ease being pregnant related digestive problems. No longer just that, this pose is also a great approach to enhance hip flexibility. That is anything a good way to come handy during labor!
How one can Do:
Stand erect together with your ft together.
Make certain your fingers are resting on both aspect of the body, palms going through the thighs.
The toes of both your legs should be parallel to one another. Slowly unfold your legs.
Elevate your hands, with palms facing the ground. Ensure your palms are aligned along with your shoulders.
Take a deep breath and bend leftwards.
Whilst elevate your right hand upwards.
Tilt your head to the left and repair your gaze on the finger-pointers of the right hand.
Preserve the function for roughly 10 to 20 counts.
Continue respiration most likely.
Now breath out slowly and lift your body up to come back to the initial pose.
Repeat the steps to your right part.
This makes one repetition. Do five such repetitions.
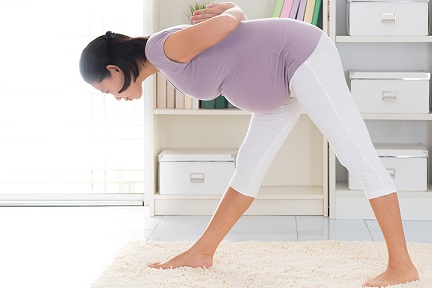
Uttanasana – Standing forward Bend:
Are your legs and back providing you with drawback? Well, you will have to are attempting Uttanasana! Usually, forward bends are discouraged during pregnancy. However, this pose is an exception.
The way to Do:
Stand straight with your feet 3 inch aside.
Leisure your palms beside your physique, fingers facing the thighs.
Breathe in deeply and carry your palms above your head, palms unfold out.
Even as breathing out, bend ahead.
Concurrently, fold your fingers in Namaskar mudra.
Proceed respiratory most likely at the same time maintaining the pose for a slow relies on 10 to 15.
Now take a deep breath and raise your physique away from the ground to come back again to the commencing role.
This makes one repetition. Repeat five times.
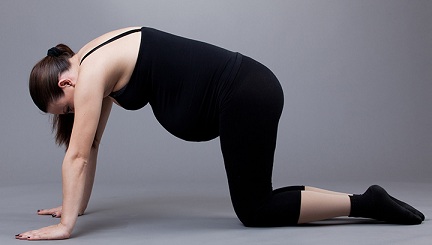
Marjariasana – Cat Pose:
The cat pose must be limited to the primary 26 weeks of the being pregnant. This pose improves your blood circulation levels. It additionally strengthens your wrists and shoulders.
Marjariasana – Cat Pose
The right way to Do:
Kneel on the floor, with knees beneath your hips and palms under the shoulders.
Take a deep breath and lift your chin. Even as chase away your head moderately.
Keep your head straight.
Keep your buttocks company. Soon you’ll think a tingling sensation.
Maintain the pose for approximately 30 to ninety seconds at the same time respiratory deeply.
Exhale and convey your chin near your chest.
Relax your buttocks and arch the back as much as possible.
Keep this pose for a rely on 10 and then return to the opening role.
Repeat this pose as frequently as that you could. However make sure to take a second spoil in between!
Shavasana – Corpse Pose:
Now comes the time to chill off. The Corpse pose is the ultimate strategy to loosen up your physique after a yoga session.
The best way to Do:
Lie down straight along with your back on the floor.
Keep your eyes closed.
Calm down your physique and intellect. Let go off all of the stress and negativity. Just consider of the little life growing inside your physique. Take your time.
Now, arise straight.
Quilt your face along with your fingers and take ten rapid breaths.
Massage your complete face – eyes, forehead, and cheeks, at the same time taking ten rapid breaths.
Performing the above-mentioned yogas may be beneficial for the pregnant ladies to attain normal delivery or for the well being of the baby as well.